
How Do I Sort Data in a Report?
In this next 'Basics' article, we'll look at how to sort data by different columns in a report.
Video more your thing? Check out the video version of this guide here.
Much like in Excel, sorting lets you choose which columns you want to sort the data by (alphabetically). This can be very useful if you are looking to change how data is grouped for ease of readability.
Default Sorting
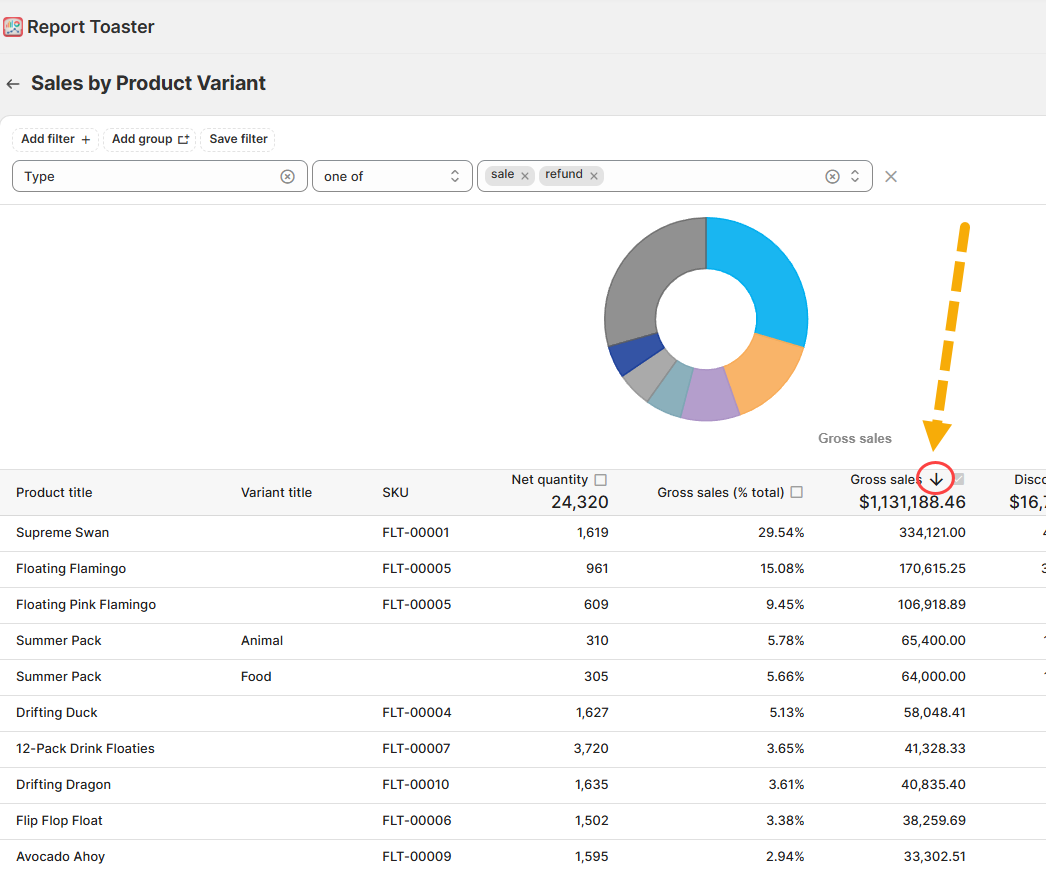
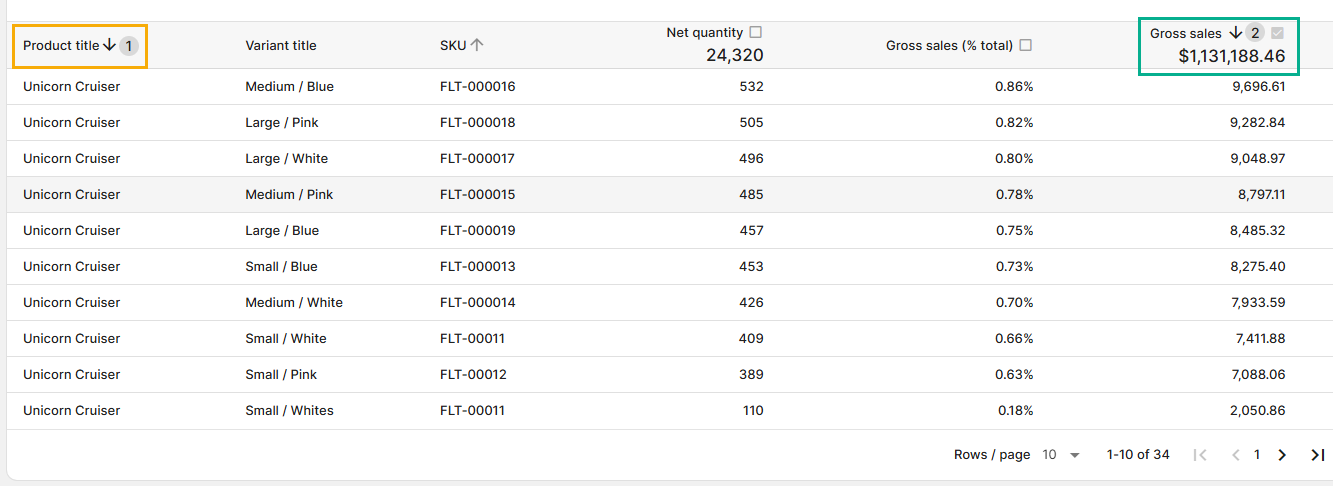
Let's start with a fresh report, the 'Sales by Product Variant' report.
Most reports have a default sort option to define how the data is sorted. You can notice this via the arrow in the column header, like so:
(click image to enlarge)
Ascending vs Descending
Right away, you can tell from the direction of the arrow that all of the data is sorted by 'Gross sales', descending from Highest to Lowest.
In other words, this report shows me which products had the most sales in the last 30 days.
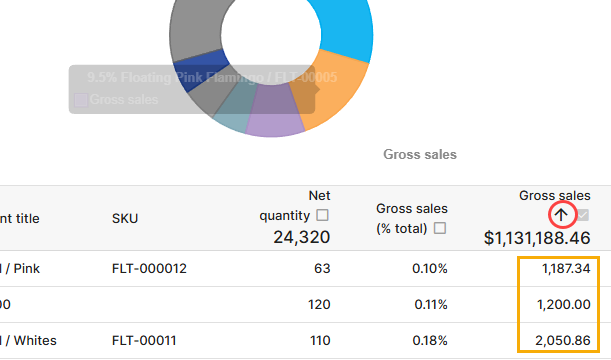
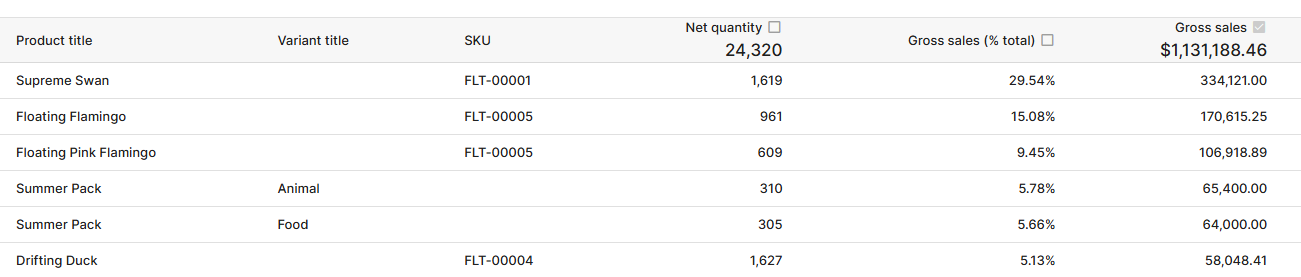
If I changed the header to be ascending from Lowest to Highest (which we'll cover in a moment), the data would instead look like this:
(click image to enlarge)
Sort Levels
Much like in Excel, you can have multiple sort levels to decide how you want your data sorted.
Once you do so, a number will appear by each arrow so you can tell what level each sort is.
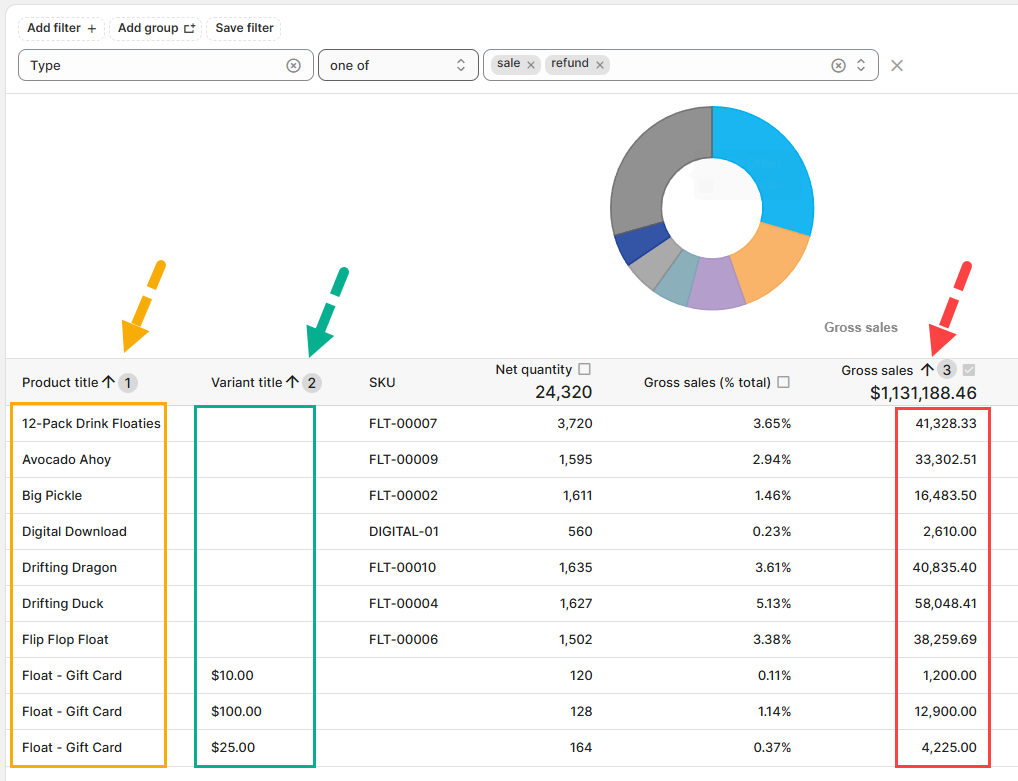
For example, let's say I wanted this report to be sorted by:
Product Title (Ascending, A–Z), then
Variant Title (Descending, Z–A — grouping similarly named variant sizes together), then
Gross Sales (Descending, High to Low)
The end result would look like this:
(click image to enlarge)
Essentially this comes down to something like "Sort by X, THEN Sort by Y (etc)".
As you can see, grouping the data like this makes it much easier to view the data and helps produce a clean, alphabetized list of how products are selling.
Adding, Removing, and Changing the Sort
So now that we know how the sort options work, let's go through how to add them to a report.
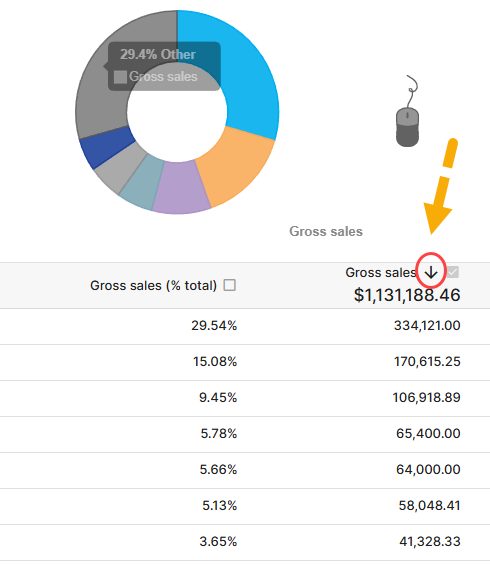
Each of the sort options runs on a clickable cycle.
Every time you click on a column header, it cycles through the following states:
No Sort → Sort Ascending → Sort Descending → No Sort (repeat)
(click image to enlarge)
Changing Sort Levels
First, let's start with the basic 'Sales by Product Variant' report sorted by Product Title, then by Gross Sales:
(click image to enlarge)
Now suppose I want to change it to sort by Gross Sales first, then Product Title.
First, remove the existing sorts by clicking through each header until no sort is active. It's best to start from a clean slate.
(click image to enlarge)
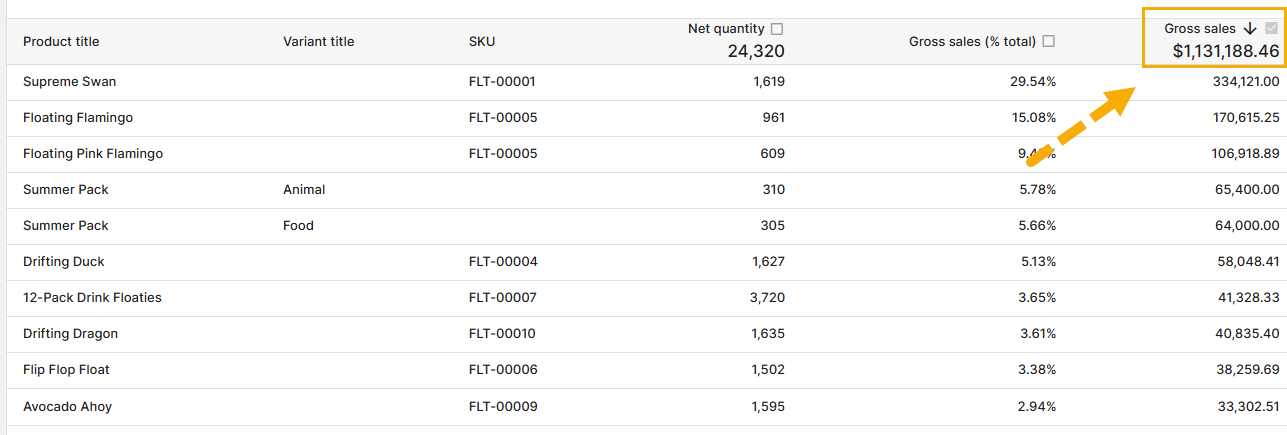
Next, click Gross Sales twice to set it to descending:
(click image to enlarge)
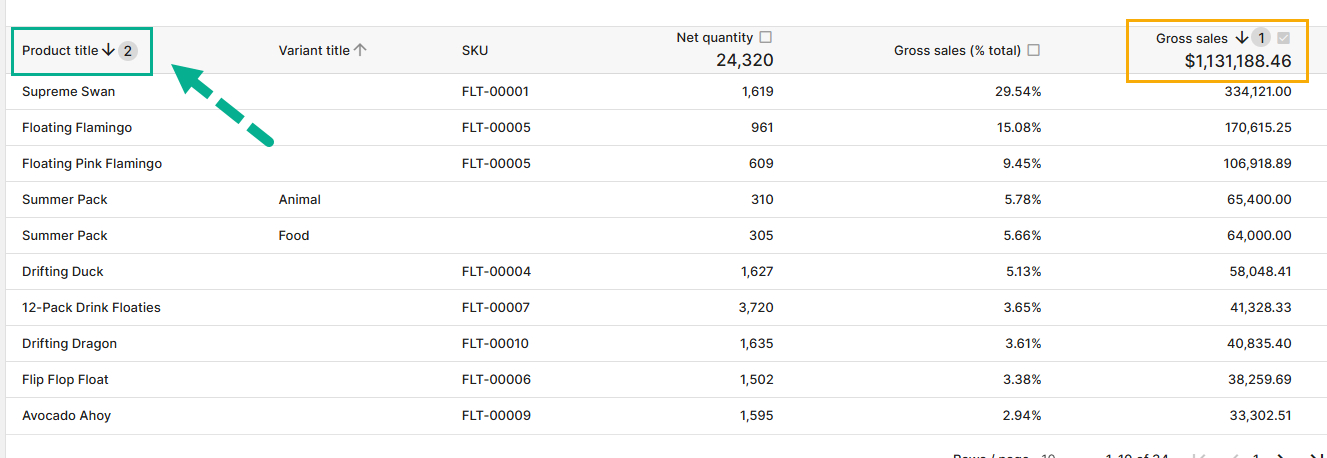
Then click Product Title twice to add it as the second sort level:
(click image to enlarge)
The general rule of thumb is simple:
Add your first sort level first, then your second, then your third, and so on.
This makes it easier to track and ensures your data is grouped correctly.
If you remove a higher-priority sort level, the next level automatically moves up in priority.
And that's it!
For other articles in our Basic Guides series, check out our main section here.